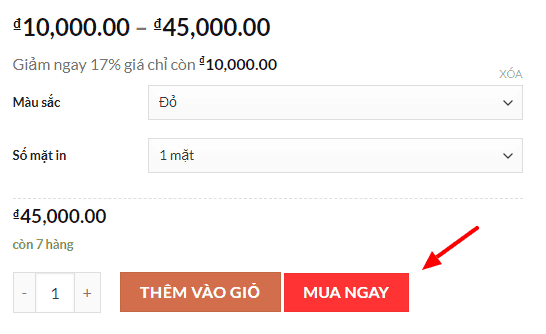
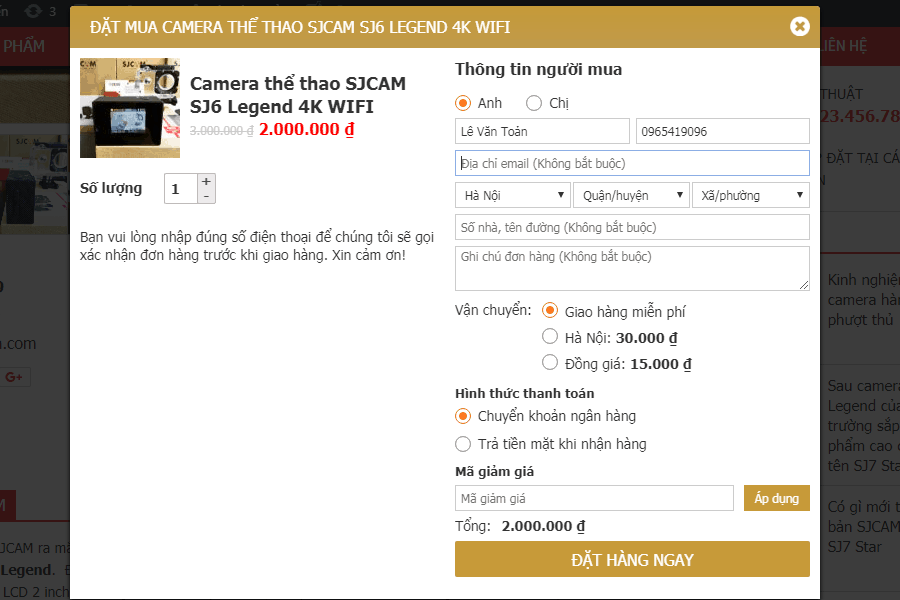
Trong bài này mình sẽ chia sẻ code thêm nút Mua Ngay vào Woocommerce một cách đơn giản. Nút Mua Ngay này có chức năng rất đơn giản, chỉ là click vào và chuyển hướng tới trang giỏ hàng, đồng thời thêm sản phẩm đã chọn vào giỏ hàng. Nếu bạn nào quan tâm đến nút Mua Ngay hiện popup thì xem bài này nhé – Với plugin Quick buy thì chúng ta có thể mua ngay sản phẩm ở bất kỳ đâu 1 cách nhanh chóng đơn giản cho người dùng.
Ưu điểm của đoạn code thêm nút Mua ngay như sau:
- KHÔNG cần BIẾT CODE vẫn làm ngon lành
- KHÔNG cần cài thêm plugin
- Chỉ thêm code vào functions.php
- Nhẹ nhàng
- và đặc biệt dùng được cho sản phẩm có biến thể
Nếu bạn muốn mua nhanh dạng popup, mua ngay trên trang chi tiết sản phẩm thì bạn tham khảo sản phẩm này nhé. Plugin mua hàng nhanh cho Woocommerce
Cách thêm nút Mua Ngay vào woocommerce
Bạn chỉ cần thêm đoạn code này vào file functions.php trong theme của bạn đang sử dụng. Vậy là xong
* Add quick buy button go to checkout after click
* Author: levantoan.com
*/
add_action(‘woocommerce_after_add_to_cart_button’,’devvn_quickbuy_after_addtocart_button’);
function devvn_quickbuy_after_addtocart_button(){
global $product;
?>
<style>
.devvn-quickbuy button.single_add_to_cart_button.loading:after {
display: none;
}
.devvn-quickbuy button.single_add_to_cart_button.button.alt.loading {
color: #fff;
pointer-events: none !important;
}
.devvn-quickbuy button.buy_now_button {
position: relative;
color: rgba(255,255,255,0.05);
}
.devvn-quickbuy button.buy_now_button:after {
animation: spin 500ms infinite linear;
border: 2px solid #fff;
border-radius: 32px;
border-right-color: transparent !important;
border-top-color: transparent !important;
content: "";
display: block;
height: 16px;
top: 50%;
margin-top: -8px;
left: 50%;
margin-left: -8px;
position: absolute;
width: 16px;
}
</style>
<button type="button" class="button buy_now_button">
<?php _e(‘Mua ngay’, ‘devvn’); ?>
</button>
<input type="hidden" name="is_buy_now" class="is_buy_now" value="0" autocomplete="off"/>
<script>
jQuery(document).ready(function(){
jQuery(‘.is_buy_now’).val(‘0’);
jQuery(‘body’).on(‘click’, ‘.buy_now_button’, function(e){
e.preventDefault();
var thisParent = jQuery(this).parents(‘form.cart’);
if(jQuery(‘.single_add_to_cart_button’, thisParent).hasClass(‘disabled’)) {
jQuery(‘.single_add_to_cart_button’, thisParent).trigger(‘click’);
return false;
}
thisParent.addClass(‘devvn-quickbuy’);
jQuery(‘.is_buy_now’, thisParent).val(‘1’);
jQuery(‘.single_add_to_cart_button’, thisParent).trigger(‘click’);
});
});
jQuery( document.body ).on( ‘added_to_cart’, function (e, fragments, cart_hash, addToCartButton){
let thisForm = addToCartButton.closest(‘.cart’);
let is_buy_now = parseInt(jQuery(‘.is_buy_now’, thisForm).val()) || 0;
if(is_buy_now === 1 && typeof wc_add_to_cart_params !== "undefined") {
window.location = wc_add_to_cart_params.cart_url;
}
});
</script>
<?php
}
add_filter(‘woocommerce_add_to_cart_redirect’, ‘redirect_to_checkout’);
function redirect_to_checkout($redirect_url) {
if(!get_theme_mod( ‘ajax_add_to_cart’ )) {
if (isset($_REQUEST[‘is_buy_now’]) && $_REQUEST[‘is_buy_now’] && get_option(‘woocommerce_cart_redirect_after_add’) !== ‘yes’) {
$redirect_url = wc_get_checkout_url(); //or wc_get_cart_url()
}
}
return $redirect_url;
}
add_filter(‘woocommerce_get_script_data’, ‘devvn_woocommerce_get_script_data’, 10, 2);
function devvn_woocommerce_get_script_data($params, $handle) {
if($handle == ‘wc-add-to-cart’){
$params[‘cart_url’] = wc_get_checkout_url();
}
return $params;
}[/php]
Code này đã được test với biến thể mặc định của woocommerce. Còn bạn nào dùng plugin thứ 3 để custom hiển thị biến thể mà bị lỗi thì comment bên dưới nha
Chúc các bạn thành công!


